
This article provides information on how to set your default printer in Windows 10 and Windows 11 operating system. This can be helpful when you are using your computer.
Windows 10
To choose a default printer:
- Select Start > Settings .
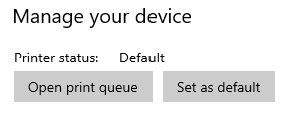
- Go to Devices > Printers & scanners > select a printer > Manage. Then select Set as default.
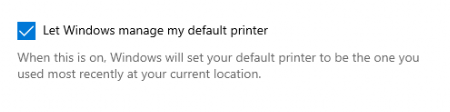
If you don’t see the Set as default option, the Let Windows manage my default printer option may be selected. You’ll need to clear that selection before you can choose a default printer on your own.
Your default can be the printer you last used. To turn on this mode:
- Open Start > Settings > Devices > Printers & scanners.
- Select the checkbox beside Let Windows manage my default printer.
Windows 11
To choose a default printer:
- Select Start > Settings .
- Go to Bluetooth & devices > Printers & scanners > select a printer. Then select Set as default.
If you don’t see the Set as default option, the Let Windows manage my default printer option may be selected. You’ll need to clear that selection before you can choose a default printer on your own.
Your default can be the printer you last used. To turn on this mode:
- Open Start > Settings > Bluetooth & devices > Printers & scanners.
- Select the toggle next to Let Windows manage my default printer and verify that it says On.
More information can be found here
If you need further assistance with your Windows products, we have a full team to assist you. Contact us below.