
You now have AnyDesk. What’s next? We need to install AnyDesk. Follow the following AnyDesk installation instructions on how to install and setup.
Choose your operating system and click to download the file
Click on the downloaded file to begin the installation process
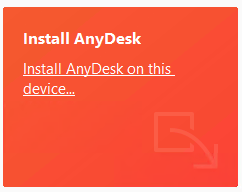
When the window opens, click on “Install AnyDesk”
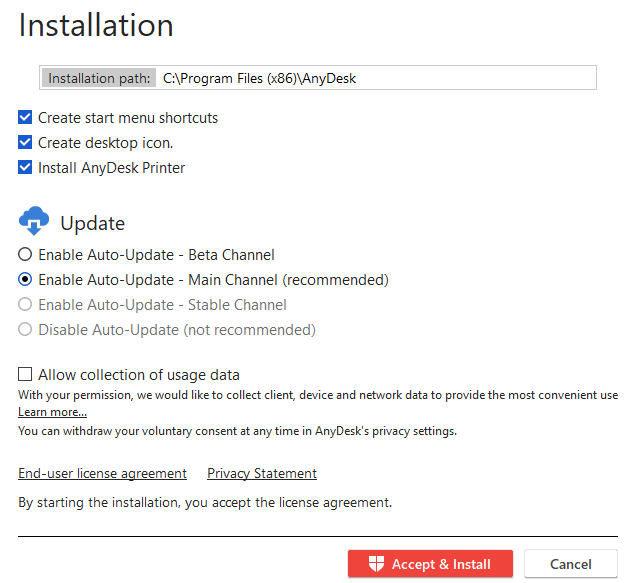
Next click on “Accept & Install”
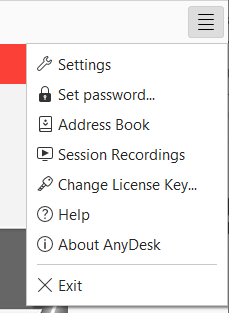
Next, click on the 4-Lines button on the top-right, and then click on “Change License Key…”
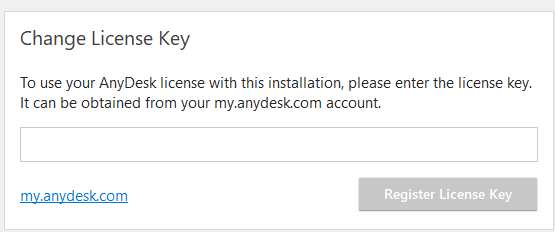
Scroll down on the page to enter the license we provided you and enter it here. Click on “Register License Key”.
This will conclude the installation. Next, we will discuss how to connect.
Click on “New Session” at the top of the screen
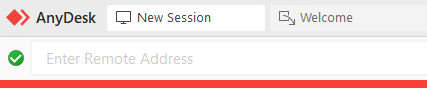
Enter the remote address we provided you. Press enter.
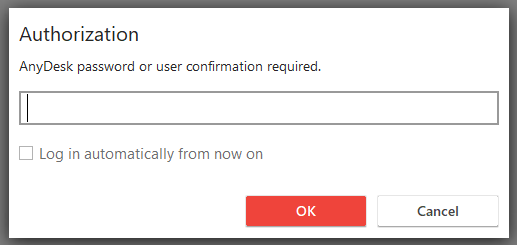
Next the system will ask for a password. Enter the remote password we provided you there. Press OK and then you should have a secure connection.
You can choose to save the password by checking the box under. We do not recommend using this since it is a less secure method but will make it easier for you to connect in the future.
Now you should have an established session. If you have any problems with the AnyDesk installation instructions, let us know. We will be glad to assist further.